
Create job
Jobs are used to capture and track customer orders. Typically, a job contains a collection of parts with varying quantities, due dates, priorities, and part order.
New jobs can be created in the following ways:
-
From existing parts in the part library.
-
By dragging parts directly into the Jobs page and manually providing job parameters.
-
From assemblies.
-
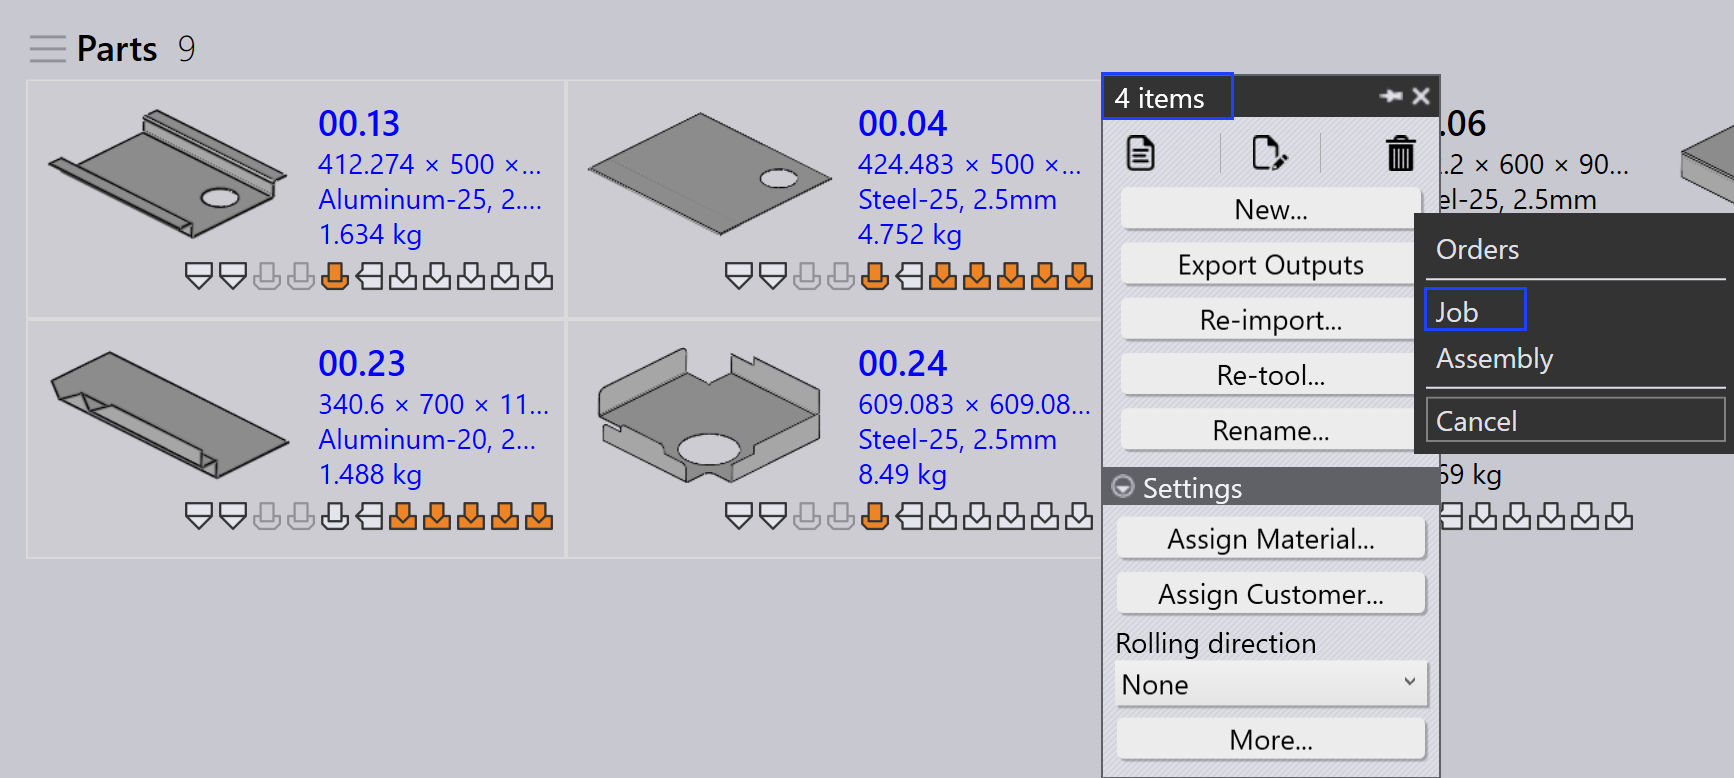
Select a few parts from the part library and right-click to open the part panel.
-
Click New… → Job. This opens the New Job window.
-
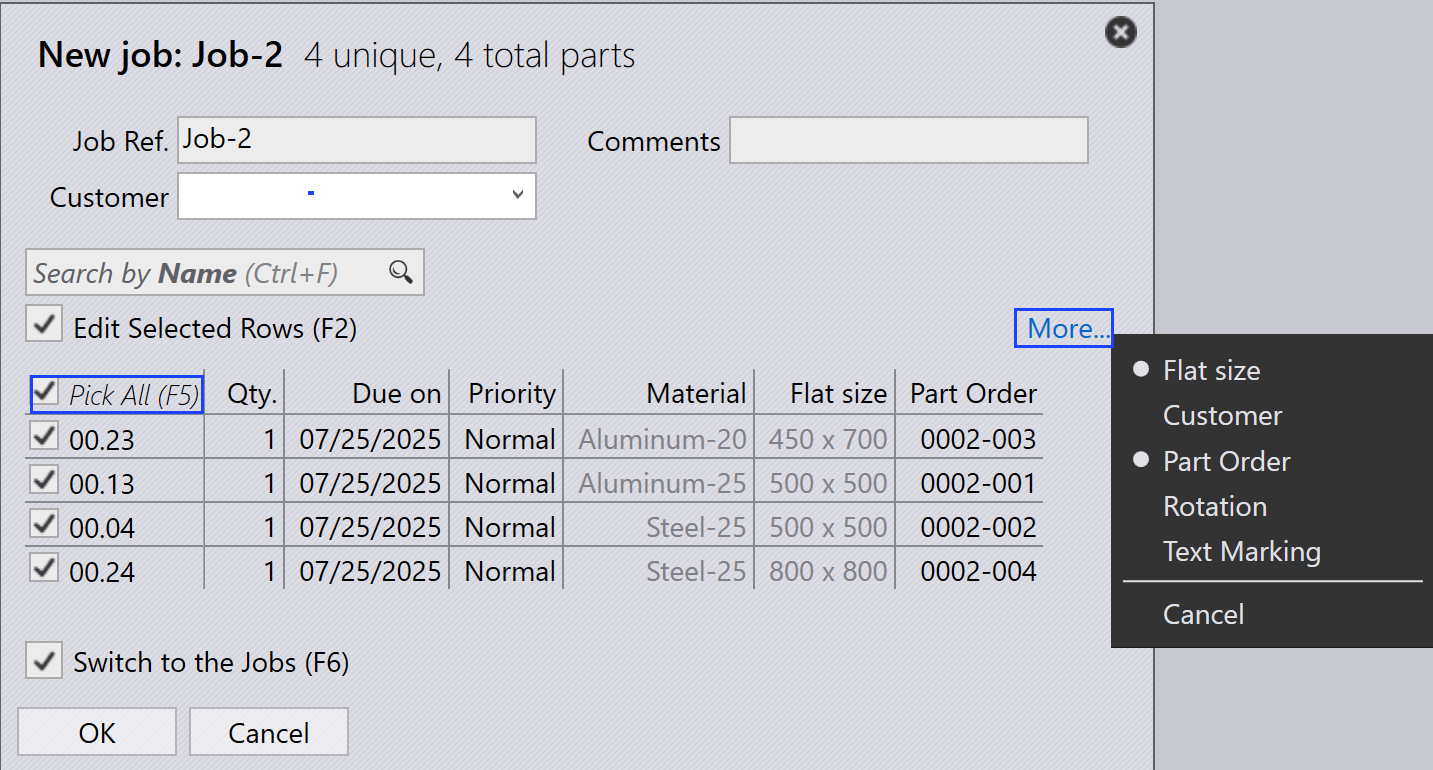
In the New Job window:
-
Enter the required job fields: Job Reference, Customer, and Comments.
-
Click More to access additional fields like Customer, Rotation, and Text Marking, if needed.
-
Enable Pick All F5 to update all selected parts when editing any one. Use this to change part quantity, due date, priority, etc.
-
Click OK after entering all job details.
-
-
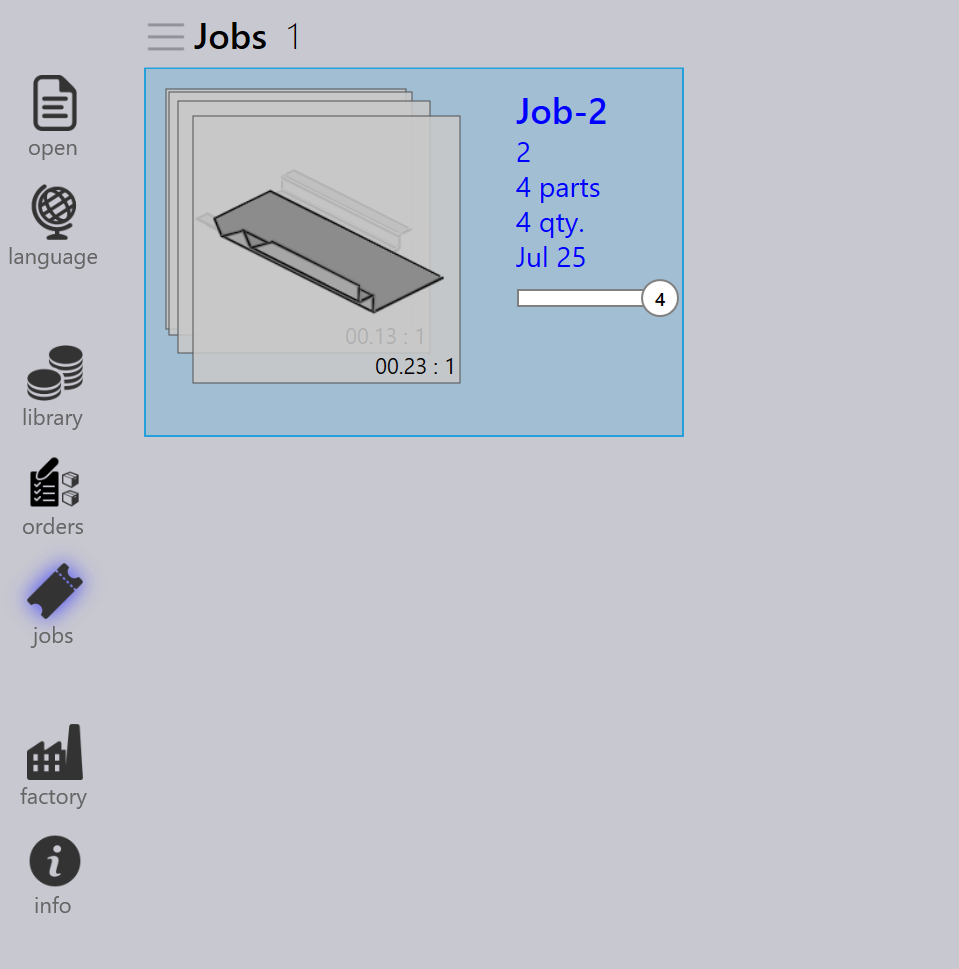
If Switch to the Jobs (F6) is checked, the system will switch to the Jobs page and the job will be created automatically.
-
You can also import a job using one of the following methods:
-
Import from a text file.
-
Import from spreadsheets (CSV or XLSX format).
-
Use a watch folder.
-
For more information, see the chapter below.