
Assembly
Create static nests from an assembly
Static nests can be generated for an assembly using the Interactive nesting wizard. These nests are fixed layouts associated only with the selected assembly.
-
Switch to the assys view.
-
Right-click the required assembly and select Create Nests….
-
The Interactive Nesting wizard opens.
-
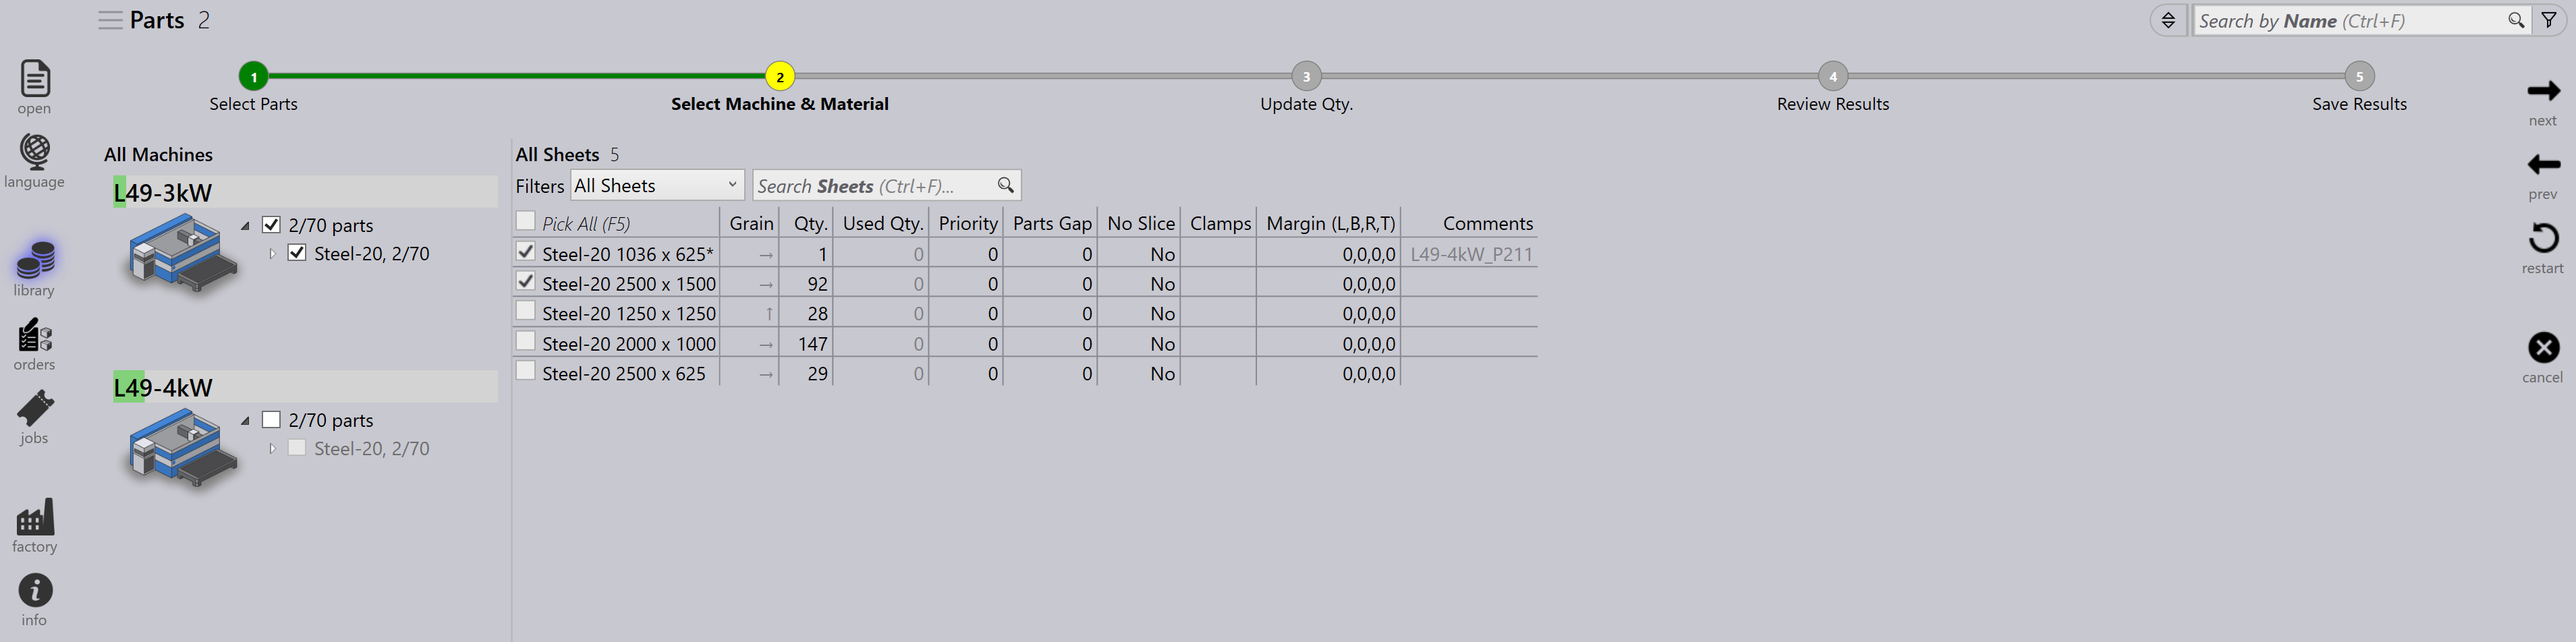
By default, the interactive nesting wizard switches to Select Machine & Material page.
-
Machines are shown with color bars indicating available production load:
-
Green bar: Scheduled hours
-
Grey bar: Available hours (out of an 8-hour shift)
-
-
Under each machine, selected Parts are grouped with their Raw-Material (Parts/Total Quantity).
-
If a part does not have a valid tooling solution for a machine, that part and material are ignored for processing for a given machine.
-
If a raw material is selected for one machine, it won’t be available for other machines.
-
Once the machine nest plan is set, select the preferred sheet and override sheet parameters like Priority, Quantity, Margins, etc.
-
You can filter sheets to show All Sheets, Standard Sheets, or Remnant Sheets. Click next.
| It is not possible to increase the quantities at this stage. You can either keep the same as the sheet inventory quantity or reduce it and check nesting results. |
-
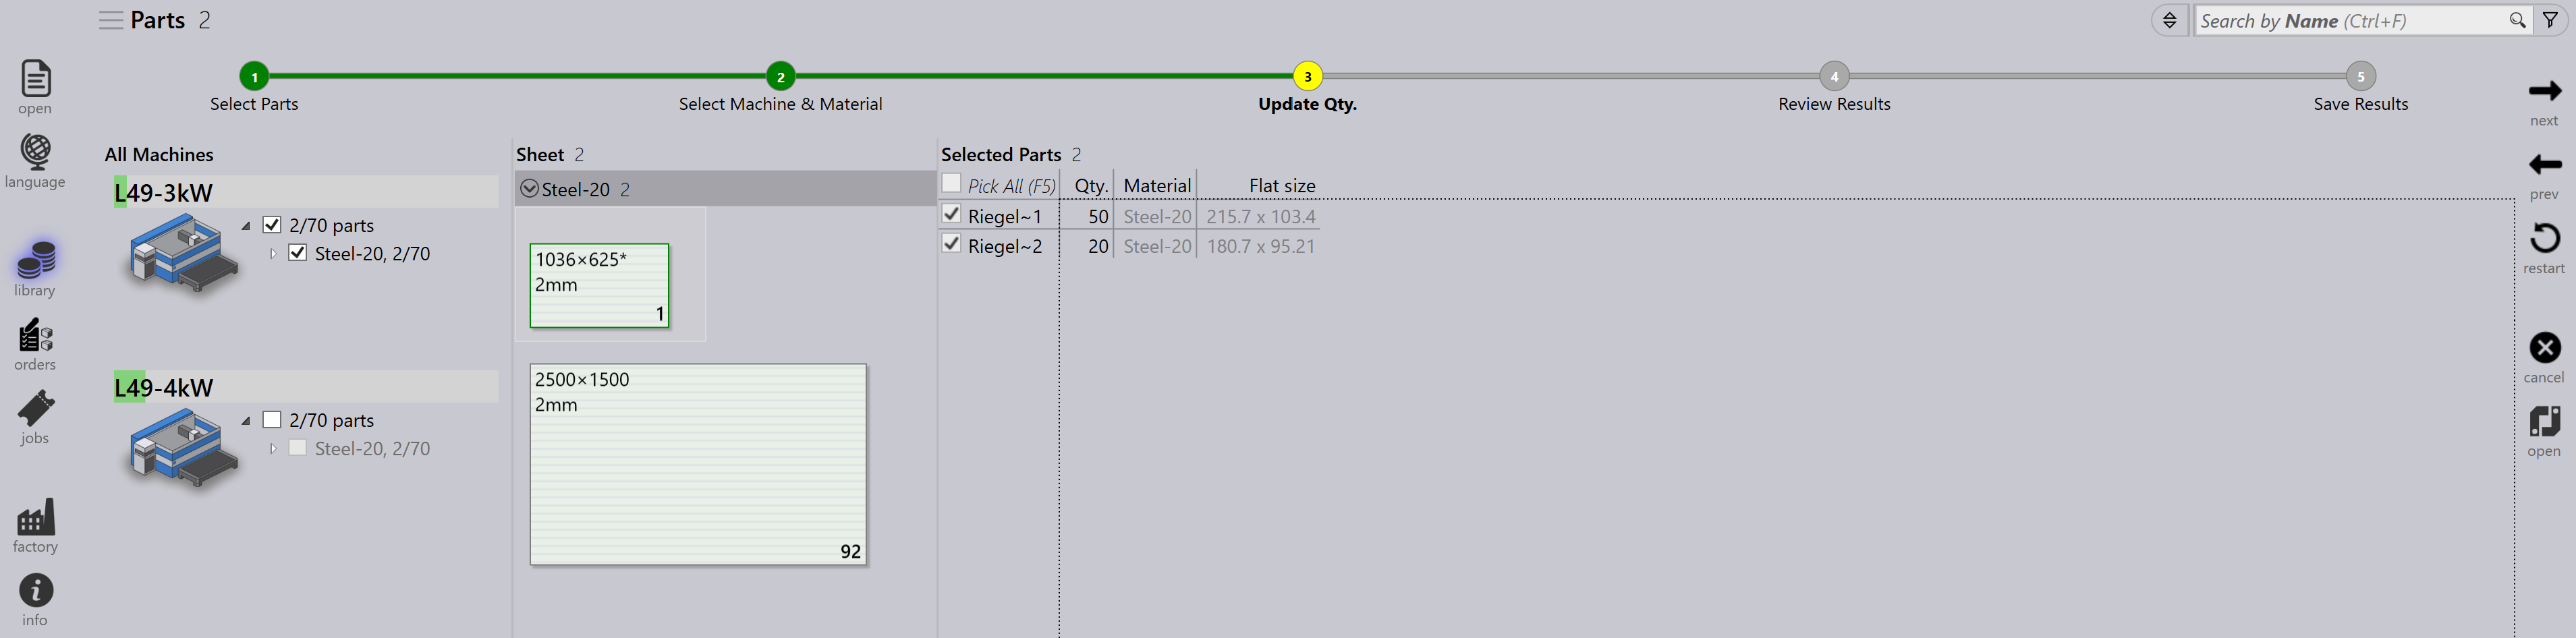
Update Qty appears in Interactive nesting plan window.
-
By default, Pick All (F5) includes all parts for nesting, or you can manually pick priority parts and adjust part quantities. Click next.
-
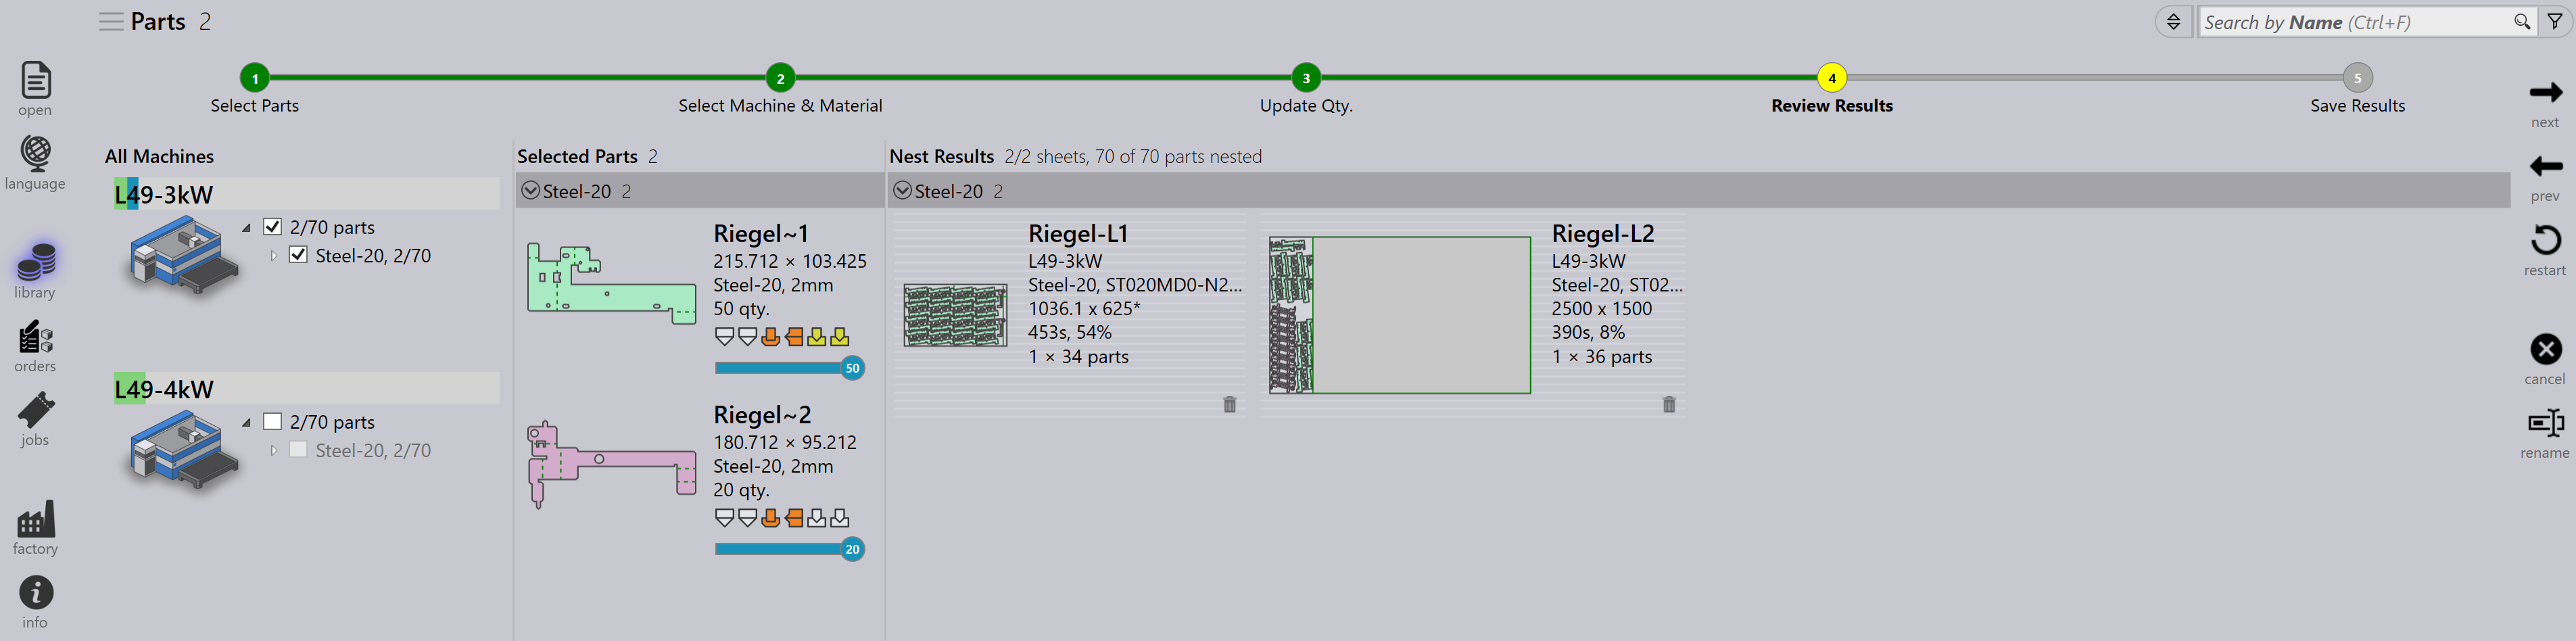
Nesting starts and parts nested in sheet are updated with blue color status.
-
The machine’s production load updates based on the nest result.
-
If some parts remain unnested, the message Some parts remain unnested appears - these parts stay in the original job.
-
A part may remain unnested if no suitable sheet is available.
-
-
Static Nests can be edited to include unnested parts:
-
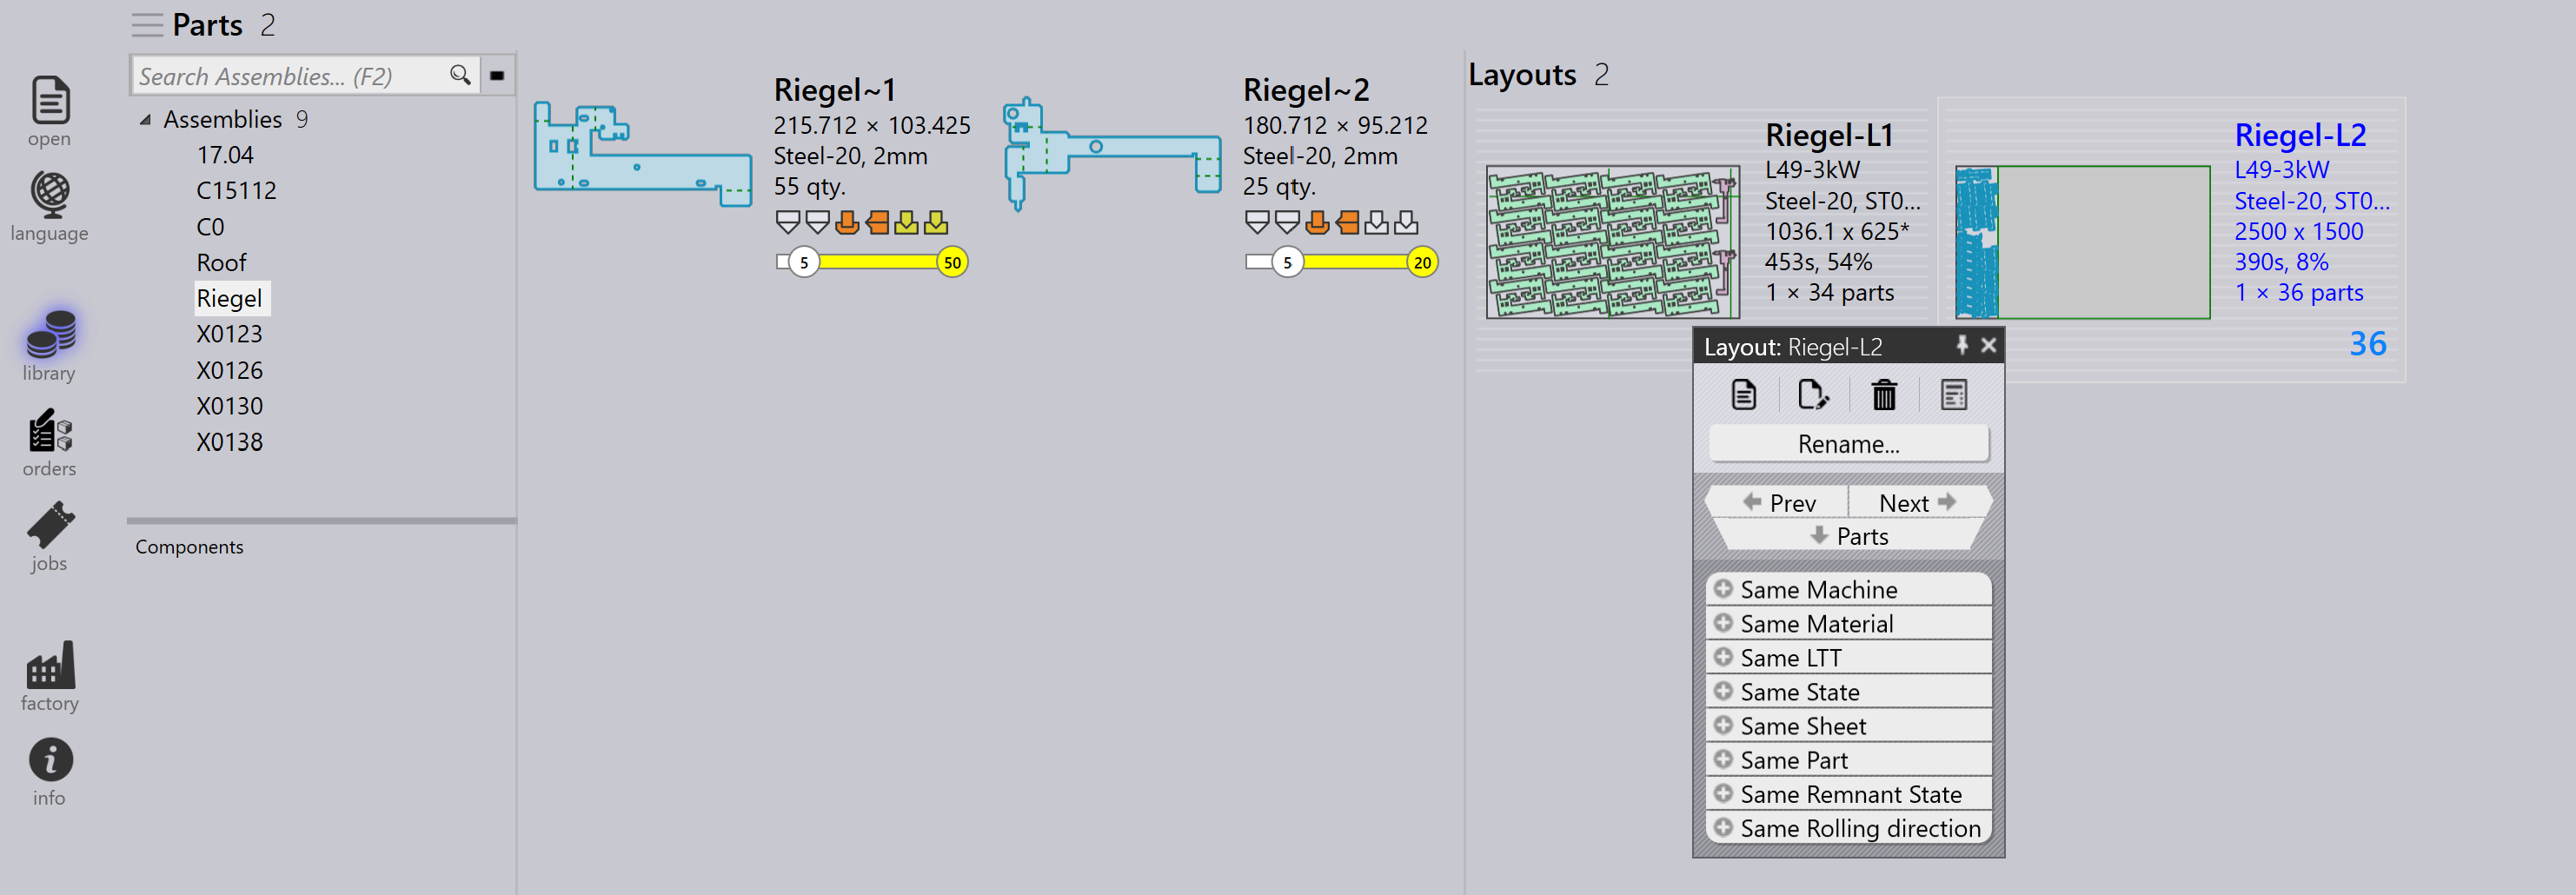
Select the layout where you want to insert unnested parts and check it out for editing.
-
-
Flux opens. Click Pick or Pick All to select unnested parts from the parent assembly.
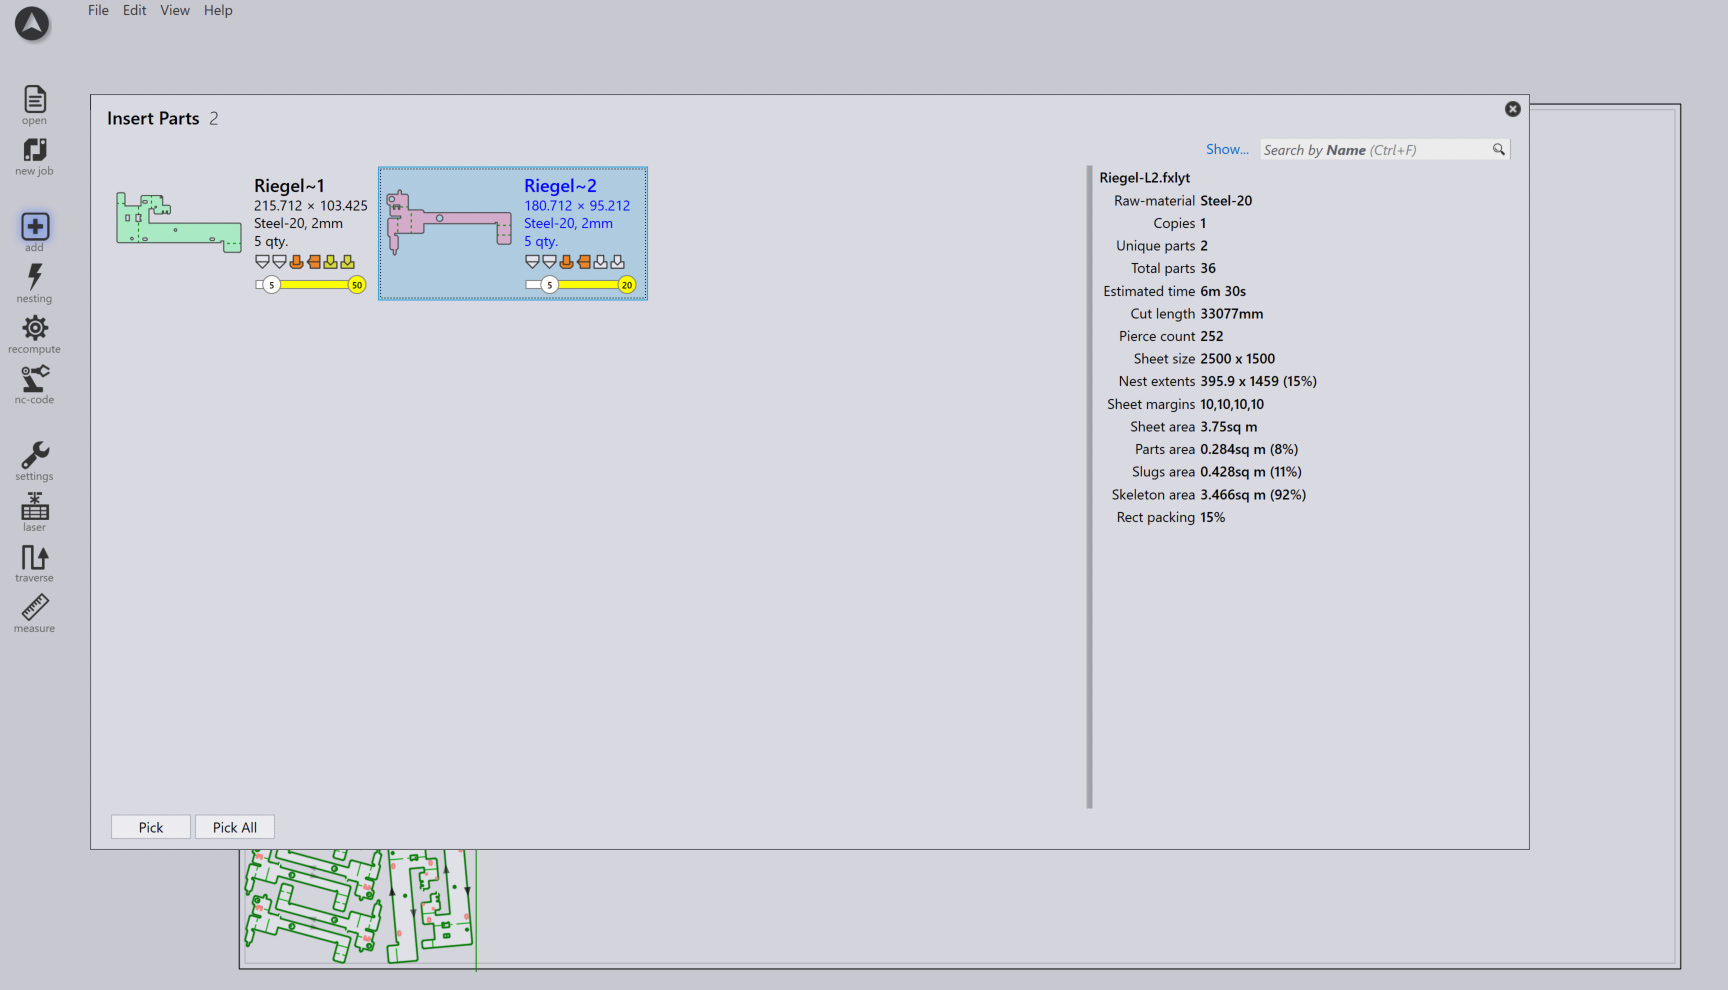
-
Arrange the part in layout as needed.
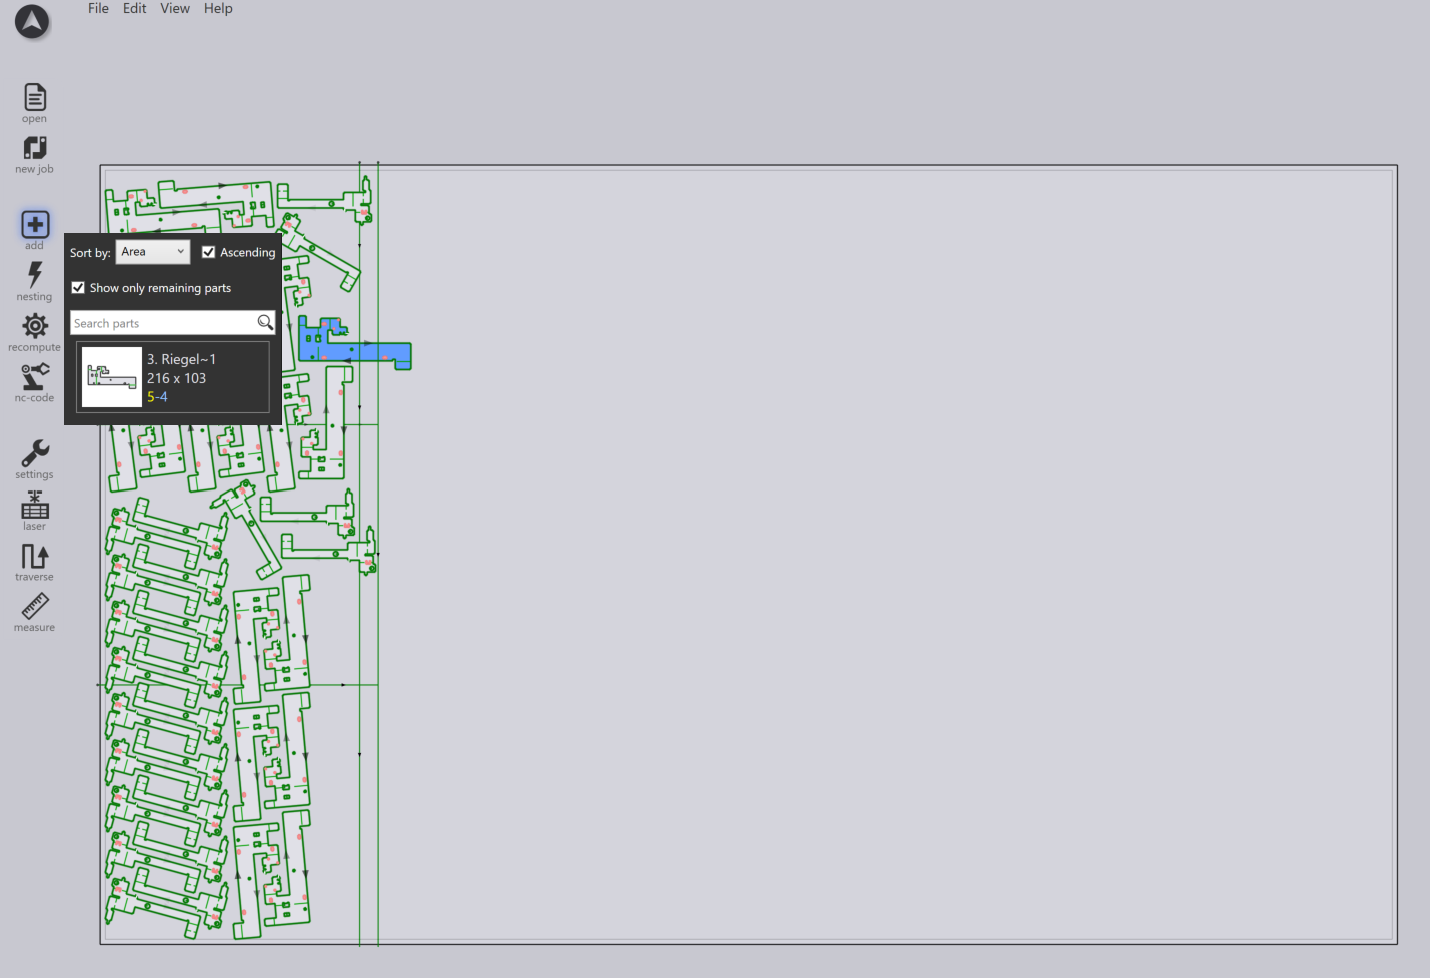
-
Generated nests are automatically named after the parent assembly for easy identification.
| Static nests cannot contain parts from other assemblies. Allowing mixed assembly nests would prevent releasing one assembly without releasing the others, so mixing is disallowed by design. |
Non-sheet metal components
-
When an assembly is imported, sheet metal parts are extracted and added to assemblies in the Part Library.
-
Non-sheet metal components are separated and added to the Components.
-
The assembly is added to the Assembly Library and its BOM (Bill of Materials) contains both parts and components.
-
If a part has already been imported as a sheet metal part, the system updates the existing entry and removes duplicates from the Part Library.
-
Selecting an assembly displays both parts and components, with component quantities shown under the component image (selected assembly component count and total component count).
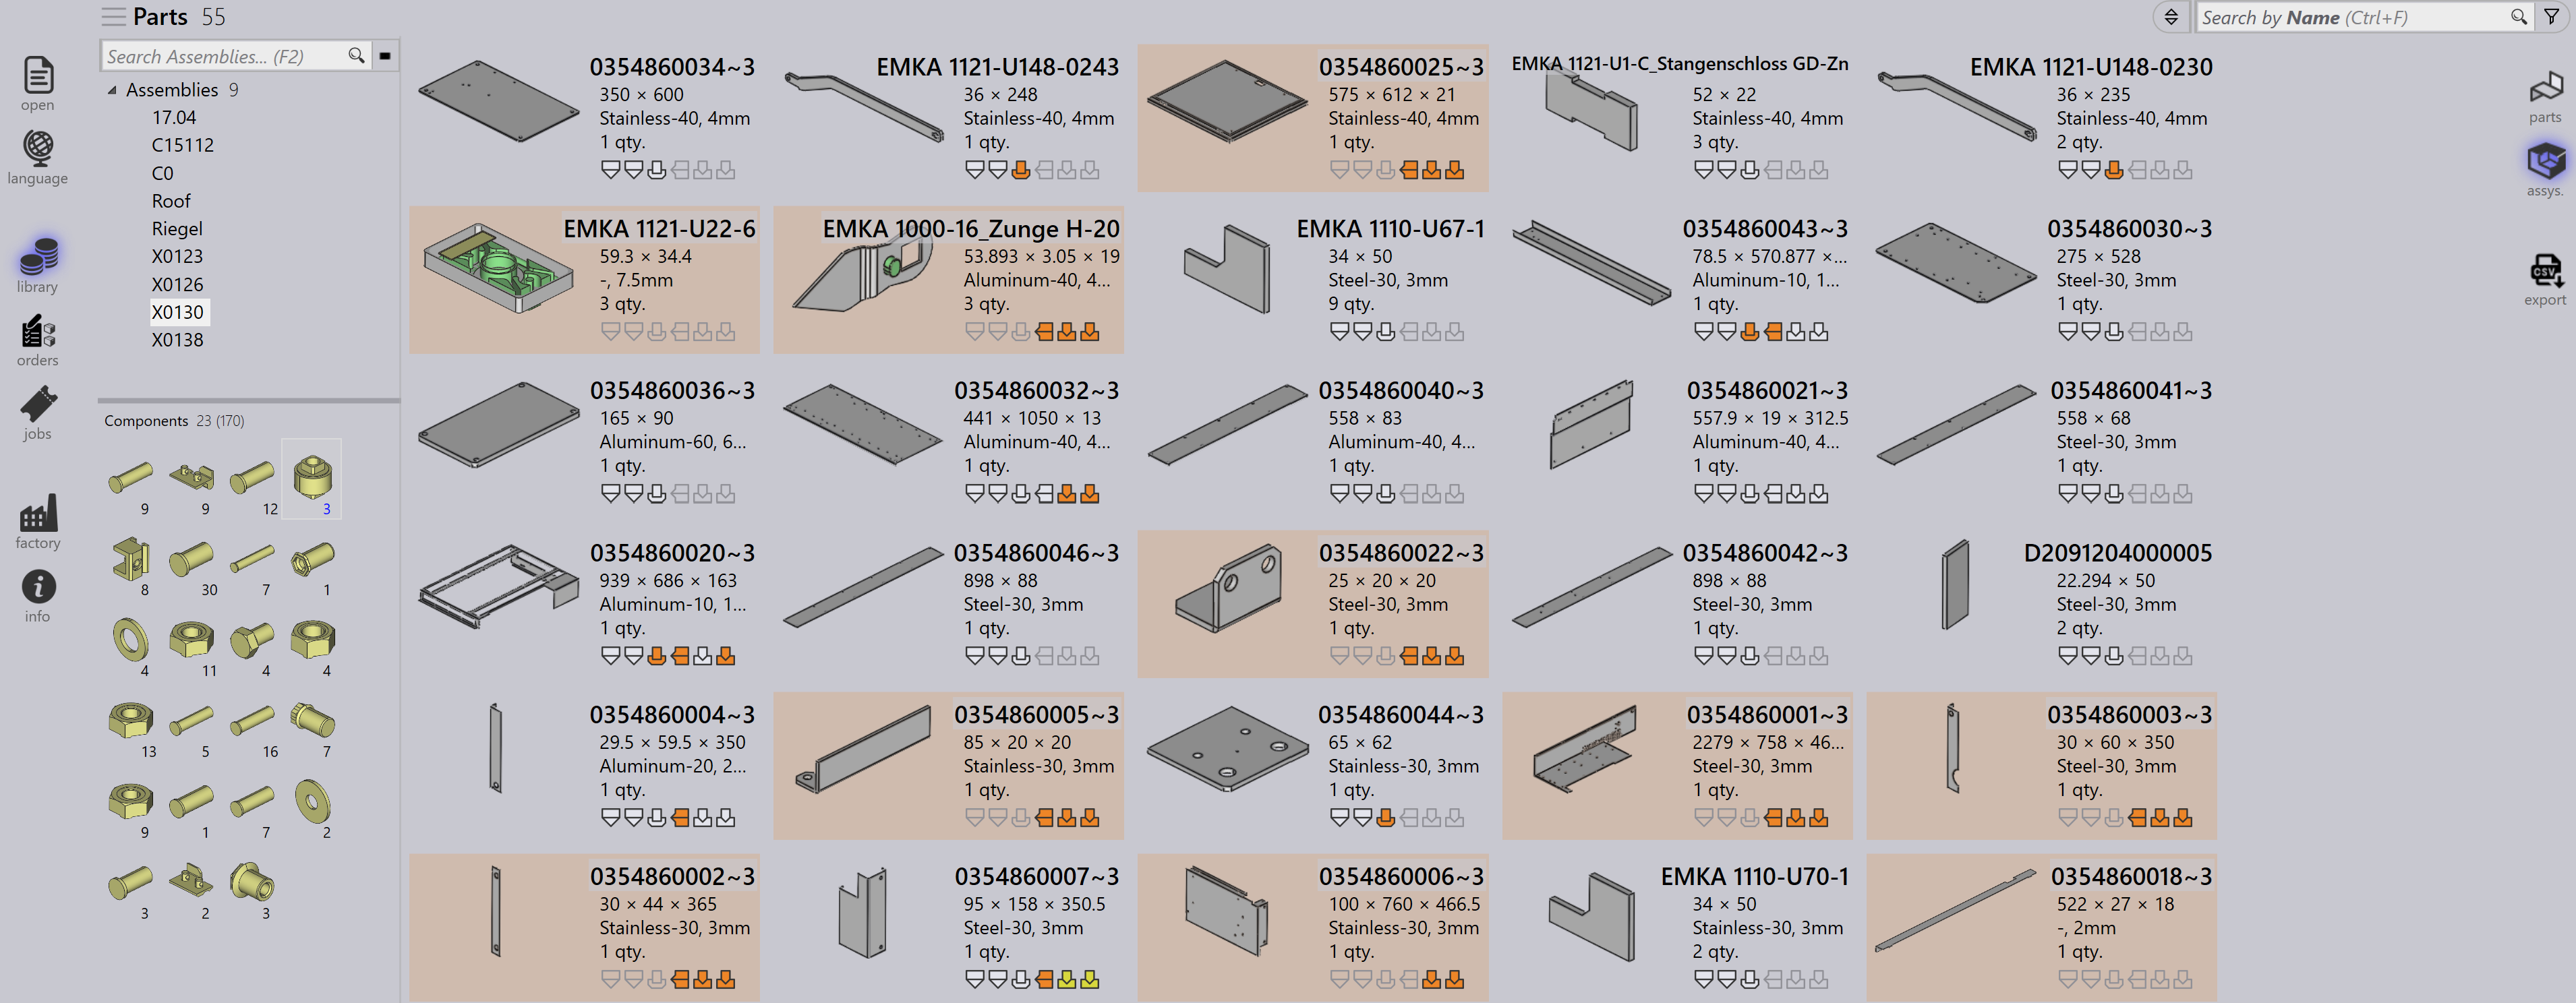
-
Component tooltips display the name, material, and size. Components are excluded during production - they are not nested, and no sheets are generated for components.
-
Sample assemblies and components are available at: C:\Program Files\Metamation\Praxis\Samples\Assys\Components, which can be used to test component import and assembly workflows.
Creating job from assembly
-
Right-click the assembly, click New…, and then Job.
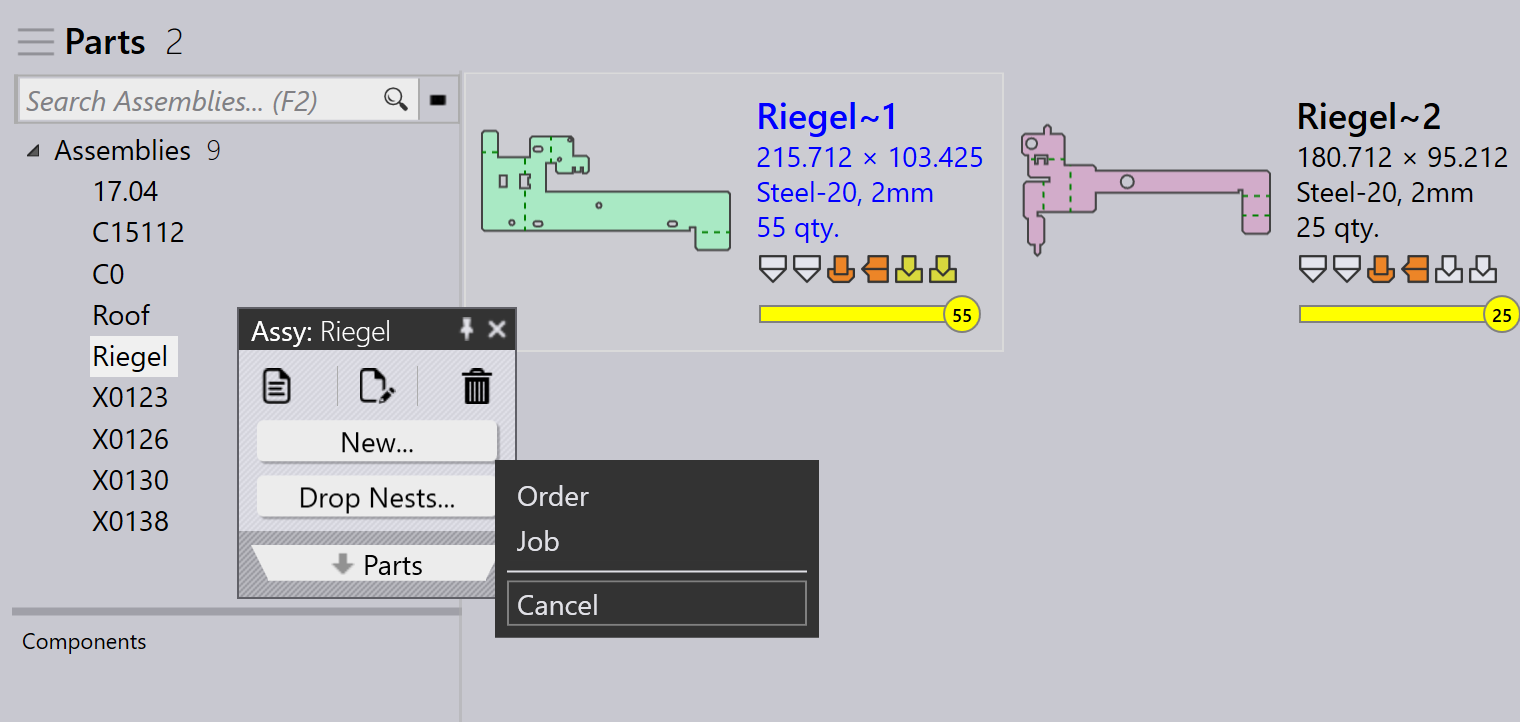
-
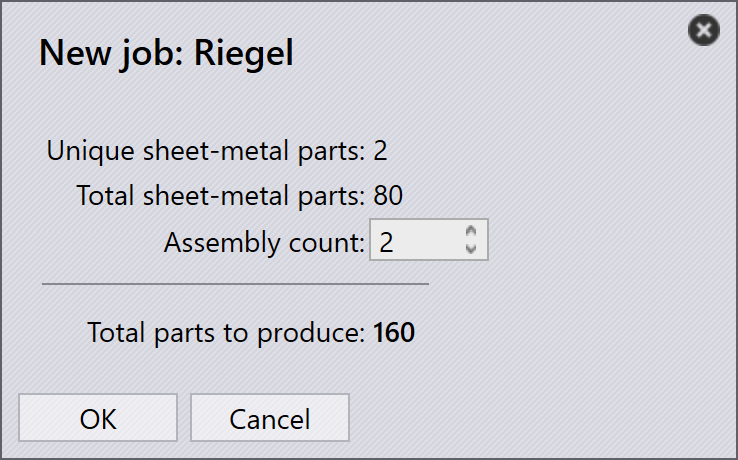
In the New Job dialog, set the assembly count, click OK, and then update job details (such as due date and priority) as required.
-
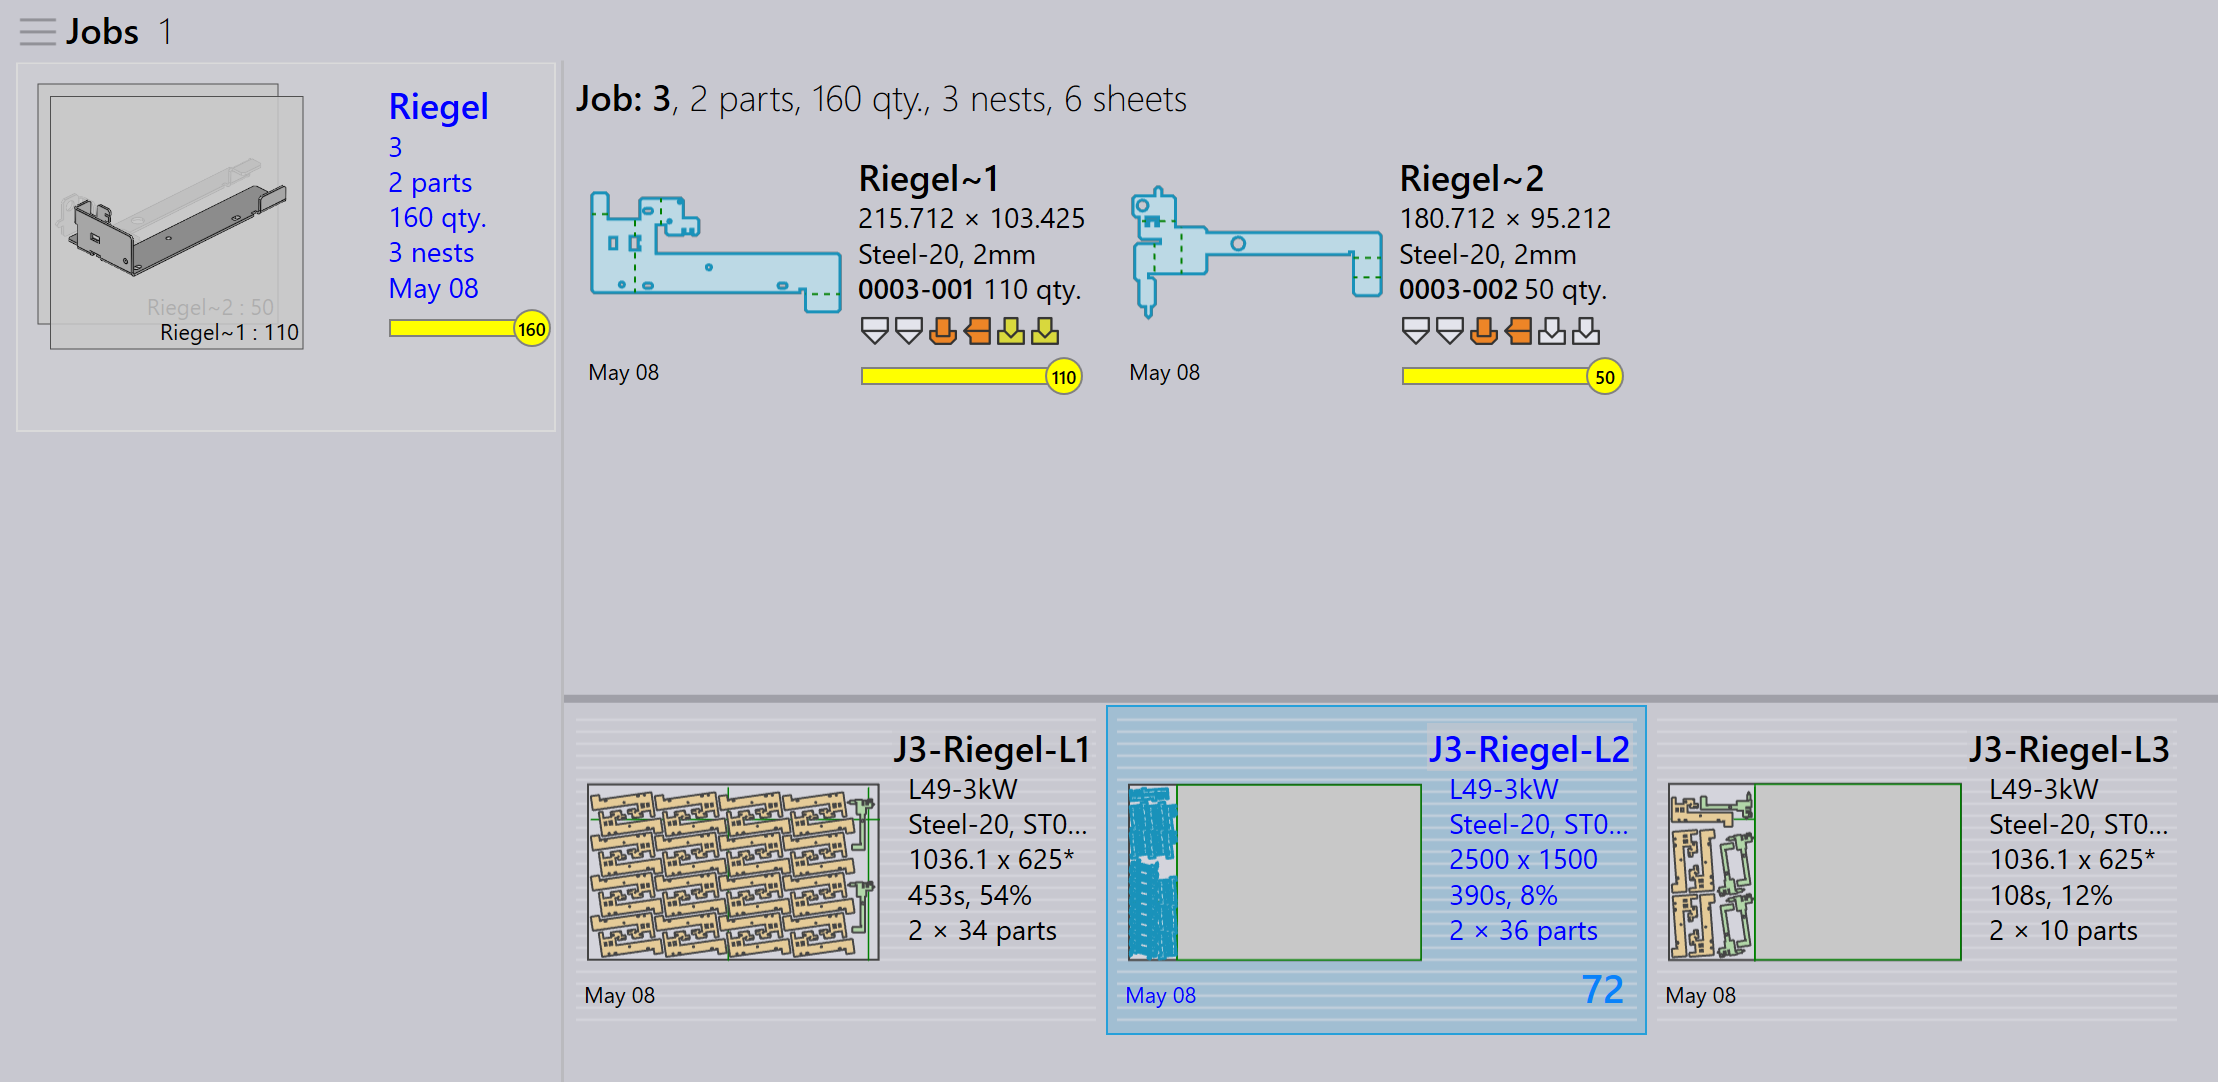
The system creates a job from the assembly and copies static nests as job nests, updating sheet counts. Copied nests are prefixed with the job ID.
-
Job nests can be edited or deleted without affecting the original static nests.
-
Job nests can be repacked using Adapt/Compact… or Add parts….
-
For detailed steps, see Adapt/Compact and Add parts.
|
If a part does not appear in a nest, check the nest edit dialog - you can insert unnested parts manually. Use saved searches and filters to quickly find parts across multiple assemblies. Use clear, descriptive assembly and nest names to avoid confusion when copying nests into jobs. |